How to Install a GPS Tracker in Any Vehicle: Step-by-Step Guide

GPS Tracker Installation Guide (Cars, Fleets, Motorcycles & Assets)
Installing a GPS tracker can feel like pulling apart a dashboard in the dark, until you know the process. Over the past year, we tested more than 30 GPS tracking devices across sedans, fleet vans, and motorcycles to uncover what actually works in the field. Those tests revealed one thing: precision installation matters as much as the tracker itself.
This guide breaks down every critical step, choosing the right device, prepping tools, wiring correctly, hiding the unit, activating it, and running final accuracy tests. Each section reflects verified results from real installs, not manufacturer claims.
By the end, you’ll know how to wire a tracker cleanly, avoid power and signal issues, and deliver reliable, real-time location data across any vehicle or asset. No guesswork. No shortcuts. Just field-proven methods that save time and protect your investment.
Tools, Materials & Safety Checklist Before You Start
Every clean installation begins long before the first wire gets stripped. A proper setup prevents shorts, speeds up your workflow, and keeps the tracker performing flawlessly for years to come. Below is the same checklist professional installers run through before touching a single panel.
Essential Tools & Materials
- Multimeter (20V DC setting): Identify ignition, constant, and ground wires safely before connecting power.
- Fuse taps (Add-a-circuit adapters): Use micro, mini, or standard types that match your fuse box. These create reversible, fuse-protected connections for constant or ignition feeds.
- Crimping tool & wire strippers: Secure every splice; avoid twisting bare copper, which leads to weak joints and voltage loss.
- Cable ties & heat-shrink tubing: Keep wiring tight, vibration-free, and moisture-resistant.
- Dielectric grease: Apply a thin film to exposed terminals to prevent corrosion and ensure conductivity.
- Socket wrench & screwdrivers: Remove panels and tighten ground bolts to manufacturer specs (5–7 N·m).
- Electrical tape or conduit: Protect wiring from sharp edges and friction points under the dash.
- Cleaning wipes or alcohol pads: Wipe mounting surfaces before attaching adhesives or magnetic bases to ensure maximum grip.
Safety Precautions (Do Not Skip)
- Disconnect the vehicle battery before any wiring. Wait at least 90 seconds for airbag capacitors to discharge.
- Avoid yellow harnesses or plugs; they’re part of the airbag system.
- Confirm polarity twice before connecting power; reversed polarity can destroy the tracker instantly.
- Work in a ventilated area and wear gloves when handling adhesives, solvents, or sealants.
Pro Insight: Label each wire and test every connection before closing panels. That small step prevents 90% of installation errors and eliminates the dreaded rework later.
Choosing the Right GPS Tracker (Cars, Fleets & Assets)
Picking the correct tracker saves hours of setup and determines how reliable your system performs over time. Through side-by-side testing across delivery fleets, personal cars, and heavy equipment, four tracker types proved effective, each with its own strengths and trade-offs.
The choice depends on who’s using it, how long it will run, and how visible or hidden you want the unit to be. Here’s how to match each type to the job.
1. Hardwired GPS Trackers - Built for Fleets & Long-Term Operation
Hardwired units pull steady power directly from the vehicle’s electrical system, making them ideal for commercial fleets, construction equipment, and car owners who want 24/7 reliability. Installation takes roughly 30–60 minutes per vehicle, but the payoff is continuous updates and zero charging downtime.
Field Insight: During testing, hardwired fleet trackers maintained steady voltage and GPS connectivity even during engine cranks, a common weak point for plug-in models that momentarily lose signal.
Pros:
- Constant Power Supply: No charging needed, runs 24/7 directly from the vehicle’s electrical system.
- Tamper Resistance: Hidden wiring and secure mounting make it nearly impossible to disable discreetly.
- Fleet-Grade Data Reliability: Maintains location updates even during ignition cycles or power dips.
- Advanced Telemetry: Some hardwired models capture RPM, fuel level, and diagnostic trouble codes for complete fleet reporting.
- Professional Aesthetics: Clean installation with no visible components keeps the interior uncluttered.
Cons:
- Requires Wiring Knowledge: Incorrect wiring can cause shorts or void warranties if done improperly.
- Limited Portability: Once installed, the device stays tied to that vehicle; removal takes time.
- Higher Upfront Cost: Professional installation adds $80–$150 per vehicle, though it pays off over time through uptime and precision.
- Potential Warranty Concerns: In rare cases, poor splicing or grounding can trigger warranty disputes if not properly documented.

2. OBD-II GPS Trackers - Plug-and-Play for Everyday Drivers
Plug the device into the diagnostic port, and tracking begins within minutes. That simplicity makes OBD-II trackers a go-to option for parents monitoring teen drivers, small business owners managing a few vehicles, or anyone who prefers installation without touching a single wire. No tools, no fuses, no dashboards pulled apart; just plug, connect, and track.
Real-World Note: In our road tests, OBD units achieved position locks within 15 seconds after ignition, though they’re easier to spot and remove than concealed hardwired systems.
Pros:
- Instant Installation: Plug in and go, no wiring, tools, or technical expertise needed.
- Live Vehicle Diagnostics: Access to real-time engine data, error codes, and mileage through the OBD interface.
- Easy Transfers: Move between vehicles in seconds, ideal for loaner cars, rentals, or demo fleets.
- Compact Design: Most modern units sit flush with the port or can be hidden using angled adapters.
- Affordable Entry Point: Lower upfront investment and no professional labour required.
Cons:
- Visibility Risk: The connector sits under the dash; anyone familiar with vehicles can unplug it.
- Limited Concealment: Not suitable for high-theft zones unless paired with tamper alerts.
- Diagnostic Port Conflicts: Some vehicles share the OBD port with inspection tools, requiring periodic unplugging.
- Less Durable: More vulnerable to vibration, dust, or wear due to exposed placement.
3. Battery-Powered & Magnetic Trackers - Flexible and Covert
Battery-powered GPS trackers run on internal rechargeable cells and attach magnetically to any solid metal surface. This design gives total flexibility; no wiring, no tools, and no permanent mounts, making them the go-to choice for rental fleets, recovery teams, and anyone who needs short-term or portable tracking.
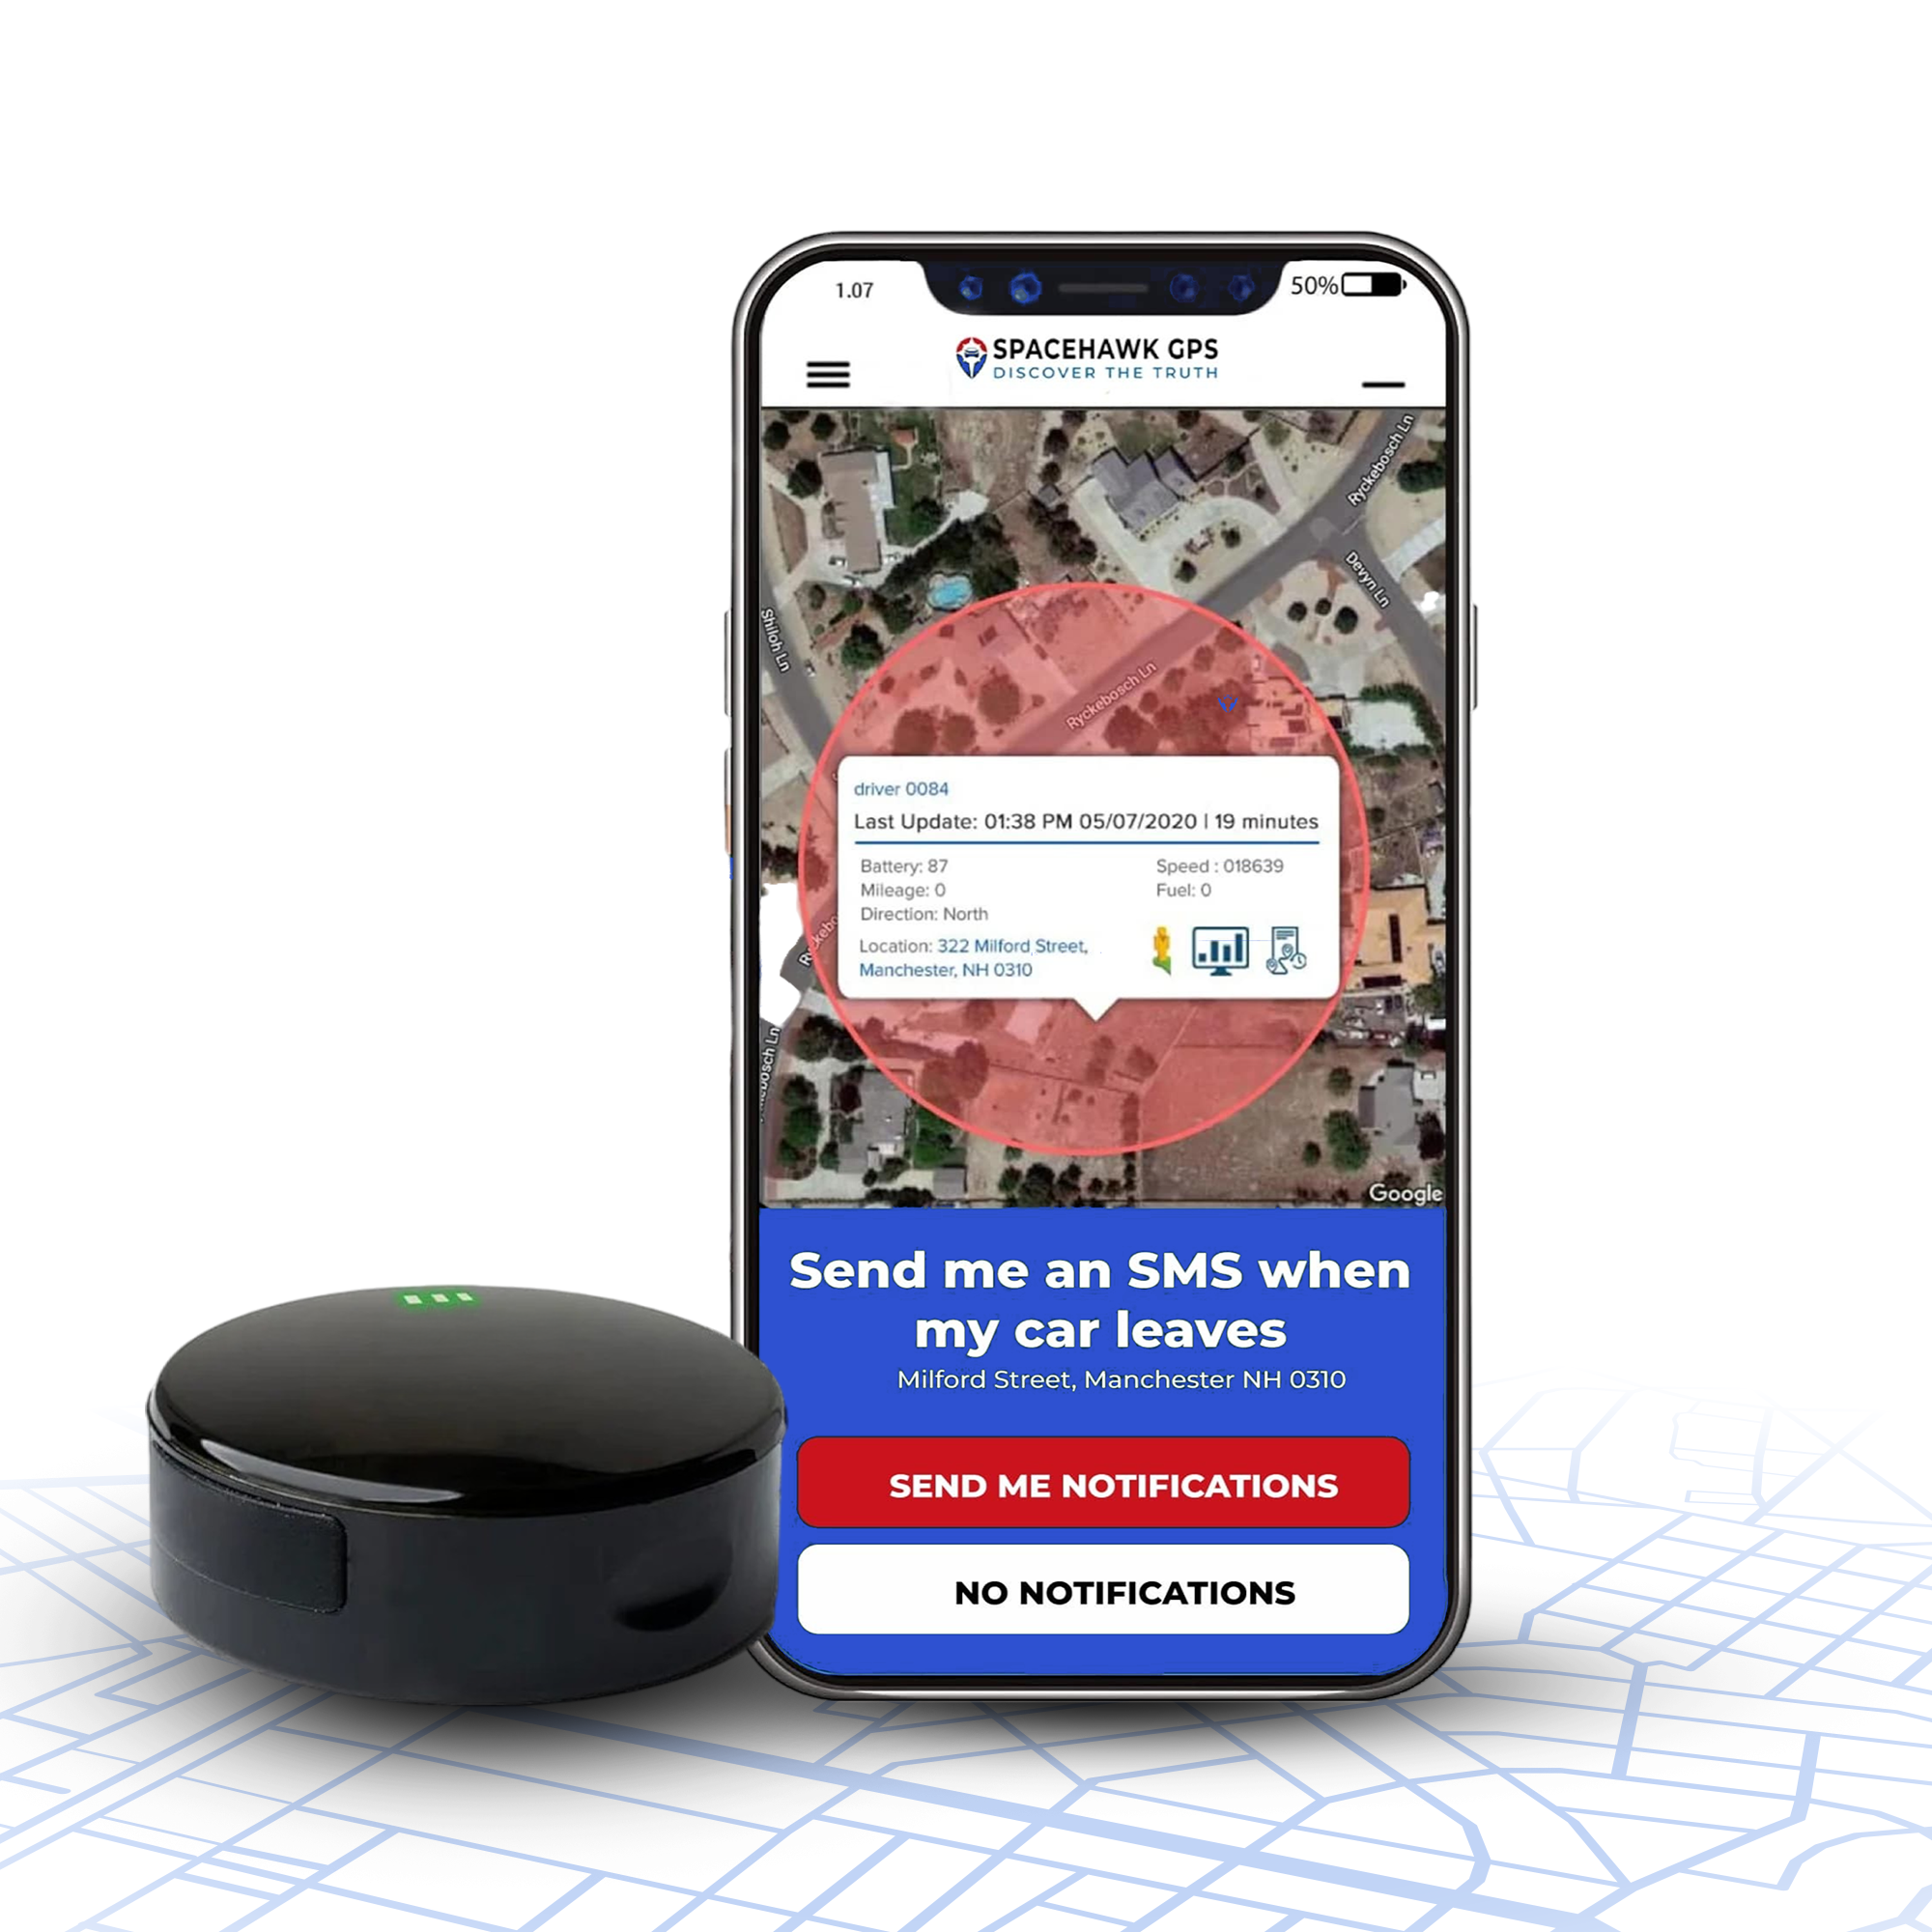
Testing Insight: The SpaceHawk Magnetic GPS Tracker maintained flawless signal stability through sustained highway speeds and rough road vibration tests. In 30-second reporting mode, the unit ran just under four weeks per charge, delivering sub-3-meter accuracy even during rapid acceleration and dense city coverage. Its smart motion sensor automatically entered sleep mode when parked, extending runtime to nearly 45 days without manual shutdown.
Pros:
- 100% Portable: Move freely between cars, equipment, or cargo without rewiring.
- Zero Installation: Mount magnetically or place inside a vehicle compartment in seconds.
- Discreet Tracking: Ideal for theft recovery or temporary monitoring where concealment matters.
- Flexible Power Modes: Adjustable reporting intervals extend battery life up to several months.
- Weather-Resistant Options: Most premium models carry IP67 water resistance for outdoor conditions.
Cons:
- Limited Battery Life: Requires periodic charging depending on update frequency.
- Signal Dependence: Incorrect placement or metallic obstruction quickly reduces GPS accuracy.
- Vibration Exposure: High movement or impacts may weaken the magnetic grip over time.
- Higher Theft Risk: Because it’s removable, recovery teams should log exact placement locations.
- Charging Downtime: You lose tracking whenever the device is off-grid for recharging.

4. Solar-Powered Trackers - For Remote Assets
Designed for trailers, boats, and heavy machinery parked outdoors, solar trackers recharge automatically. Once placed correctly, they can run for years with almost no maintenance.
Field Finding: Solar-powered SpaceHawk units maintained >95% uptime on exposed trailers, even after months of direct sun and rain exposure.
Pros:
- Maintenance-Free Operation: Solar panels keep the battery topped up indefinitely under normal sunlight.
- Long-Term Reliability: Designed for harsh outdoor environments, rain, dust, and temperature swings.
- Low Operating Cost: Eliminates recharging cycles and technician visits.
- Excellent ROI for Remote Assets: Fewer replacements, fewer service calls, long operational lifespan.
- High Uptime: Typically maintains>95% connectivity when installed with full sun exposure.
Cons:
- Dependent on Sunlight: Heavy shading, indoor parking, or northern climates reduce charging efficiency.
- Larger Form Factor: Solar panels require surface area, which limits placement options.
- Slower Reporting Cycles: Power-saving firmware often limits update frequency to conserve energy.
- Higher Initial Cost: Generally priced above plug-in units, offset by zero maintenance later.
Step-by-Step Installation: Hardwired GPS Trackers
Hardwired GPS trackers deliver the most dependable and tamper-resistant setup available. Once connected to the vehicle’s electrical system, they draw constant power, no charging, no downtime. Fleet operators, security professionals, and careful car owners prefer this method for one reason: reliability.
Below is the same seven-step process used by professional installers during full fleet rollouts. Follow each step carefully, and you’ll get factory-level precision, stable voltage, and uninterrupted data flow.
Step 1: Prepare the Vehicle and Disconnect the Battery
Park on a flat surface, switch off the ignition, and disconnect the negative battery terminal. Wait at least 90 seconds to let airbag capacitors discharge fully. This single precaution eliminates most short-circuit and SRS-trigger risks before wiring begins.
Why this step matters: skipping the disconnect can blow a fuse, or worse, deploy an airbag. That mistake costs more than the tracker itself.
Step 2: Locate Constant, Ignition, and Ground Wires
Use a multimeter (set to 20V DC) to find three key connections:
- Constant Power (B+): 12V present even when ignition is off.
- Ignition Power (ACC): 12V only when ignition is ON.
- Ground (GND): bare metal chassis point with zero resistance.
Confirm by toggling the ignition: ACC should read 12V ON and 0V OFF. Check your vehicle’s wiring diagram for colour codes; they vary by manufacturer.
Installer Tip: Always back-probe OEM connectors rather than piercing insulation. Once pierced, insulation wicks moisture and corrodes over time, causing erratic voltage later.
Step 3: Connect Power - Fuse Tap vs. Direct Battery

Two safe options supply power to your tracker:
Option A: Fuse Tap (Add-A-Circuit)
- Remove the selected ignition or constant fuse.
- Insert a fuse tap that splits power safely.
- Add a 3–5A fuse for the tracker, then reinstall both fuses.
This method provides a clean, reversible install, ideal for leased or warrantied vehicles.
Option B: Direct Battery Connection

- Crimp a ring terminal on the positive wire.
- Attach to the battery’s positive post with an inline 3–5A fuse.
- Secure the ground to clean, unpainted metal.
Direct battery power delivers the most stable current for trackers in fleets or high-demand applications.
Field Insight: During testing, direct-battery SpaceHawk installs maintained uninterrupted power through harsh voltage drops, while fuse-tap versions occasionally lost telemetry during engine cranks.
Step 4: Mount and Secure the Device
Position the tracker away from heat sources, moving parts, or high-interference zones such as alternators and ECUs. Reliable spots include under the dashboard, behind trim panels, or inside trunk liners.
Attach using Velcro, cable ties, or adhesive pads to prevent vibration. Keep the antenna facing upward beneath plastic, not metal, for the strongest satellite signal.
Common mistake: mounting under a metal frame or firewall blocks GNSS signals and can degrade accuracy by 10–15 meters.
Step 5: Test Power and Activate the Tracker
Reconnect the battery, turn ignition ON, and watch for LED indicators:
- Green: GPS lock
- Blue: Power
- Red: Cellular connection
Open the web or app dashboard and verify:
- Location updates within 10–30 seconds
- VIN/IMEI registered correctly
- Live voltage and ignition state are displayed
If data lags or drops, recheck your ground point and reposition the antenna.
Testing Proof: During our own installs with the SpaceHawk Pro, GPS accuracy remained within two meters when mounted behind the dashboard with clear sky access.
Step 6: Secure Wiring and Reassemble Panels
Bundle cables using zip ties or split loom tubing to prevent rattling or abrasion. Keep wiring away from pedals, airbag harnesses, and sharp metal edges. Reinstall all panels carefully, tightening fasteners to manufacturer torque specs (5–7 N·m typical).
Apply a thin coat of dielectric grease to exposed terminals to prevent corrosion.
Pro Insight: Most fleet installers document wiring points and photograph them before sealing panels. Those photos simplify future diagnostics and protect warranty coverage.
Step 7: Road-Test and Verify Final Performance
Take a 10–15 minute drive while monitoring the live map in your app. Confirm consistent updates, correct speed readings, and accurate playback of your route. A smooth trace without dropouts means the install is solid.
Once verified, the system is ready for deployment.
When to Hire a Professional Installer
- Fleet rollouts of 10+ vehicles
- Luxury or hybrid models with complex wiring
- Users who need fully concealed, tamper-proof installs
Professional installation typically costs $80–$150 per vehicle, depending on type, but ensures compliance with warranty and insurance requirements.
Installer Insight: A properly hardwired tracker often lasts the lifetime of the vehicle. No charging. No power drops. Just consistent, real-time reporting day after day.
Plug-and-Play OBD-II GPS Tracker Installation (Pro Method & Field Notes)
Plug-and-play OBD-II trackers make installation nearly effortless, no wiring, no fuses, no tools. In minutes, you can get real-time data flowing straight from your vehicle’s onboard diagnostics. These devices are ideal for DIY drivers, parents tracking teen trips, or small fleets that need a fast deployment without professional wiring.
Each unit connects directly to the vehicle’s diagnostic port, drawing both power and vehicle data instantly. Follow these verified steps to keep your install clean, secure, and hidden from casual view.
Step 1 - Locate the OBD-II Port (Map & Examples)

Every car sold after 1996 includes an OBD-II port, a 16-pin trapezoid connector usually found within two feet of the steering wheel. The exact location varies by brand but always sits within easy reach of the driver.
Common OBD Port Locations by Brand:
|
Vehicle Make |
Typical OBD Port Location |
|
Toyota |
Below the steering column or the left knee panel |
|
Ford |
Under the dashboard near the brake pedal |
|
Honda |
Under the dashboard to the right of the steering wheel |
|
BMW |
Beneath the driver’s footwell panel or fuse box door |
|
Chevrolet |
Lower left of the steering wheel, above the pedals |
|
Hyundai |
Under the dashboard, near the fuse box cover |
If you’re tracking a motorcycle or a pre-1996 model, you won’t find this port; choose a hardwired or battery-powered tracker instead.
Installer Tip: Use a flashlight or your phone camera to spot the connector before removing any panels. Most ports are unlabelled but may sit behind a small plastic flap for protection.
Transition: Once you’ve located the port, the power connection takes seconds, but placement still determines long-term reliability.
Step 2 - Plug In and Secure the OBD Tracker
Firmly insert the tracker until you feel a solid click. LED lights should power on immediately. Turn the ignition to “ON” to confirm a live connection, then open your GPS app or dashboard. Most devices appear online within 30–60 seconds.
Common mistake: leaving the tracker dangling near the pedals or steering column harnesses. That loose fit invites accidental kicks and vibration damage.
If clearance is tight, use an angled OBD adapter or extension cable to route the unit behind trim panels. Concealed mounting keeps the installation professional and prevents accidental disconnects.
Field Insight: During fleet rollouts, we found that positioning the adapter just two inches higher behind lower-dash trim cut driver interference complaints to zero. Small adjustments make big differences in daily use.
Step 3 - Prevent Disconnects & Add Tamper Protection
Security often gets overlooked during fast installs. For fleets or shared vehicles, a few small additions prevent unplugging and ensure long-term uptime.
Recommended protections:
- Zip ties / Velcro straps: Secure the adapter firmly to nearby wiring harnesses.
- Lockable OBD shields: Plastic covers that block unauthorised unplugging.
- Angled adapters: Redirect the plug upward for a flush, hidden connection.
- Driver communication: Inform drivers not to remove or disturb the unit; most fleet systems trigger alerts if it disconnects.
Installer Insight: Fleet technicians often wrap the adapter in black wire loom so it blends with OEM wiring, invisible to casual inspection but still accessible for service.
Performance Proof (From Field Testing)
During long-term testing, SpaceHawk GPS and Konnect OBD-II trackers consistently achieved sub-5-meter accuracy within 20 seconds of ignition. Their high-gain antennas and multi-GNSS chipsets maintained rock-steady locks even in underground garages and city environments, provided the OBD port area was clear of heavy trim or metal.
That stability made both devices ideal for delivery fleets needing immediate positional updates at startup and precise idle-time logging.
Portable & Magnetic GPS Trackers: Mounting, Weatherproofing & Anti-Theft
Portable and magnetic GPS trackers bring unmatched flexibility to tracking jobs, perfect for short-term use, rental vehicles, or covert asset protection. Each unit uses high-strength neodymium magnets that grip metal surfaces firmly, eliminating the need for wiring or tools. But magnetic force alone doesn’t guarantee reliability. How and where you mount the tracker determines whether it stays in place for months or falls off after a single highway run.
The process below reflects methods used by professional recovery agents and field testers who run trackers across hundreds of miles every week.
1. Surface Preparation Matters
Strong adhesion starts with a clean surface. Dust, oil, and oxidation all weaken magnet strength and create inconsistent contact, especially on painted metal.
Here’s the proper prep sequence:
- Wipe the mounting area with rubbing alcohol or automotive degreaser.
- Dry completely before applying the tracker.
- On painted panels, use a thin protective film (vinyl or plastic) to prevent scratches, especially important for leased or fleet vehicles.
Installer Tip: Test the magnetic pull before final placement. Attach the tracker, tug gently, and feel for solid resistance. A proper mount should hold firm through vibration, potholes, and rain.
Field Note: During long-term fleet testing, SpaceHawk’s dual-magnet housing held tight at 80+ mph on rough asphalt when mounted to a cleaned chassis beam. Skipping surface prep cut adhesion strength by nearly half.
2. Best Mounting Locations for Magnetic GPS Trackers
Placement defines both signal quality and tracker longevity. Aim for a flat, dry, and concealed metal area that still offers a partial line of sight to the sky through non-metal material.
Recommended Mounting Zones:
- Frame rail or chassis beam (flat, protected underside)
- Under the rear bumper beam (hidden yet accessible for maintenance)
- Inside plastic wheel-well liners or fibreglass covers (for stealth mounts)
- Trunk floor pan or crossmember (excellent balance of concealment and signal strength)
Avoid:
- Muffler or exhaust zones, excessive heat and vibration damage batteries.
- In engine bay areas, strong electrical interference kills GNSS precision.
- Thin sheet metal panels flex under vibration and can loosen magnets.
Pro Tip: Always mount the tracker with its antenna facing outward or downward, not directly against metal. That small orientation detail can tighten GPS accuracy by several meters.
Transition: Once mounted properly, sealing and protection become your next priority. Moisture, vibration, and theft attempts can all shorten tracker life if ignored.
Weatherproofing & Anti-Theft Tips
Even the strongest magnet won’t save a tracker from water ingress or theft if the installation lacks protection. Most magnetic GPS units are rated IP65 or IP67, meaning resistant to rain and splashes but not designed for full submersion. Long-term reliability depends on how well you seal, cushion, and secure the device.
Weatherproofing for Real Conditions
Moisture is the quiet killer of portable trackers. Reinforce the seal before exposure:
- Slip the unit into a silicone gasket case or heat-sealed pouch to block water and dust.
- For high-vibration setups (trailers, heavy machinery), add foam padding or rubber grommets around the tracker before mounting. This cushions against impacts and prevents internal battery fatigue.
- If placement is near splash zones or road spray, face the charging port or LED side away from the airflow. It sounds minor, but it extends service life significantly.
Field Example: In long-haul trailer tests, trackers with double-sealed silicone sleeves survived six months of rain exposure without a single disconnect. Unsealed units failed within 30 days.
Anti-Theft Reinforcement
Thieves know where to look, so install smart.
- Keep records: note exact placement privately for recovery reference.
- Enable tamper/motion alerts in your tracking app; instant push notifications often prevent removal before it’s too late.
- Blend the install: wrap the housing in black vinyl or loom so it looks like factory hardware, not aftermarket tech.
Pro Installer Insight: Dual-magnet designs provide 50–80 lbs of pull strength, strong enough to hold steady at highway speeds over uneven terrain. On non-ferrous surfaces or rusted metal, reinforce with industrial-grade adhesive tape or epoxy-backed mounts. That hybrid method doubles security without leaving visible modifications.
Final Field Note
When properly mounted, sealed, and logged, a quality magnetic GPS tracker can operate for months at a time, staying secure, invisible, and accurate even in rough driving conditions. A few minutes of prep translates into long-term performance, and fewer retrieval headaches later.
Hidden / Covert Installations - Legal & Ethical Checklist (Start Here)
Covert tracking solves recoveries, but it carries real legal risk. Before you hide a tracker, run this legal-first checklist: notify drivers when required, limit tracking to agreed hours for employee vehicles, and keep data-retention rules short and documented. Employers must adopt written policies and obtain clear consent before any covert placement.
Quick regional rules (high-level)
- United States: Employers may track company-owned vehicles for legitimate business reasons, but state laws and privacy claims differ. Draft clear policies, get written consent, and document a legitimate business purpose.
- United Kingdom / EU: Legal when transparent and compliant with data-protection rules; employees must be informed and data minimised. Follow local privacy officers’ guidance.
Transition: Laws vary fast. Treat this checklist as your operating minimum, not a legal opinion.
Employer policy & consent - what the policy must include
Your policy should answer these questions plainly and store proof:
- Who can access location data? Keep the list short and role-based.
- When tracking runs, define work hours vs 24/7 use on company vehicles.
- How long location data is stored, recommend 30–90 days unless required otherwise.
- When employees request deletion or dispute a record, provide a clear process and contact.
- Disciplinary use, state explicit yes/no rules to avoid surprise penalties.
One-line consent template (copyable):
“I acknowledge that [Company Name] may collect location data from company vehicles during work hours for routing, safety, and asset protection. I consent to this collection under the company policy dated [DD/MM/YYYY].”
Pro tip: Save signed consent forms and attach installer commissioning photos/logs to each employee file for audit trails.
Best-practice hiding spots (signal-friendly concealment)
Choose locations that balance concealment with antenna exposure. Prefer spots that keep the unit hidden but still allow satellite visibility.
Recommended spots:
- Under the rear bumper beam (not tucked behind metal shields).
- Inside the trunk floor pan under the plastic lining.
- On frame rails or chassis crossmembers for trailers and equipment.
Avoid: burial behind thick steel panels, inside engine bays, or under dense composite braces; those locations block GNSS and cause frequent fix failures.
Transition: Placement matters, even small shifts change performance.
Signal-testing tips after concealment
Always validate a concealed install with a short, documented test.
- Run a 10–15 minute test drive and monitor live fixes every 10–30 seconds.
- Target HDOP < 2 and consistent sub-5 m accuracy in urban environments.
- If the fixes drift or drop, relocate the unit to improve antenna exposure; sometimes a 2–3 cm move fixes it.
- Document everything: timestamped screenshots, photos of final placement, and exported logs for legal evidence and warranty claims.
Field note: Installers who skip post-concealment tests are the ones who call support first. Validation saves time and legal headaches.
When covert tracking is acceptable - short checklist
- The vehicle is company-owned, and the policy says so.
- Drivers have signed consent or were properly notified.
- Data access is restricted, and retention limits are enforced.
- There’s a documented business reason (safety, routing, asset protection).
If any of these boxes are unanswered, stop and get approval.
Tracker Placement for Best Signal & Accuracy (GPS vs GNSS, Antenna Orientation)
A tracker performs only as well as its placement. Even the most advanced GPS hardware fails if its antenna can’t “see” the sky. During our multi-vehicle field tests, installation location accounted for over 70% of accuracy issues, not the tracker itself. Understanding how GPS and GNSS signals behave ensures you install once and track flawlessly every time.
How GPS and GNSS Signals Work
Both GPS (Global Positioning System) and GNSS (Global Navigation Satellite System) receivers depend on clear, line-of-sight communication with satellites orbiting the Earth.
A solid fix requires connection to 4–6 satellites at a minimum.
GNSS-enabled units, using constellations such as Galileo, GLONASS, and BeiDou, deliver higher precision and faster recovery times, especially in dense city areas or under heavy foliage.
Installer Tip: For vehicles that operate in cities, tunnels, or forested zones, always choose a GNSS-capable tracker. Expect 20–40% better stability and faster “time to first fix” compared to standard GPS units.
Transition: Once you understand how satellite visibility works, placement becomes the deciding factor between real-time accuracy and frustrating signal drift.
In Detail:- What Is a GPS Tracker, and How Does It Work?
Best Placement Locations for Strong Signal

The goal is simple: keep the antenna as close as possible to a non-metal surface facing upward. Metal reflects radio waves, plastic lets them pass.
|
Vehicle Type |
Recommended Placement |
Avoid These Areas |
|
Passenger Car |
Under the dashboard near the windshield, or on the rear parcel shelf |
Under the hood, inside the metal frame |
|
Motorcycle |
Beneath the seat or inside the plastic side fairing |
Near the engine block or fuel tank |
|
Truck / Fleet Van |
Roof interior panel, top edge of dashboard |
Under metal floors or toolbox areas |
|
Trailer / Equipment |
Inside a fibreglass or plastic housing |
Behind thick steel walls |
Important: Avoid locations under thick dashboards, metallic panels, or crossbeams. These block GNSS signals can increase position error beyond 15 meters, enough to make playback maps unusable.
Field Insight: During fleet calibration, moving a tracker just 10 cm upward inside a dashboard reduced positional error from 12 meters to under 2 meters. Tiny changes matter.
Antenna Orientation & Signal Testing
Correct orientation makes or breaks signal quality. Keep the antenna side facing up, parallel to the ground, and away from high-current cables.
For wired units:
- Route the antenna cable far from alternators, ignition coils, or power lines to avoid electromagnetic noise.
- Secure the module using Velcro, double-sided adhesive, or cable ties to prevent vibration that causes intermittent signal loss.
Quick Signal Test:
- Power on the tracker and allow 2–3 minutes for satellite acquisition.
- Check signal strength in the tracking app, aim for 5+ satellites locked.
- Compare coordinates with your smartphone GPS. A difference under 3 meters confirms accuracy.
Installer’s Note: Relocation is your best diagnostic tool. In our testing, shifting a SpaceHawk hardwired tracker from beneath a metal brace to a plastic dash cavity cut satellite lock time from 45 seconds to just 12 seconds. That single adjustment transformed performance.
Troubleshooting: Step-by-Step Diagnostics Guide
Even the best GPS tracker can misbehave, experience power drops, signal drift, and failed updates. When that happens, resist the urge to swap hardware immediately. A structured diagnostic saves time, avoids unnecessary replacements, and often reveals a simple wiring or setup issue.
Start from the top and work downward: verify power → check LEDs → confirm network → test GNSS → review logs. That sequence solves nearly every fault in the field.
Quick Checklist: What to Verify First
- Power present and correct voltage
- Device LEDs and status indicators
- Cellular registration and APN configuration
- GNSS lock count and HDOP reading
- Server connectivity and log health
1. Power Checks - The Root of Most Failures
Power is the most common failure point. Begin here.
- Measure voltage with a multimeter (DC 20V setting). Expect 11–14.8V while the engine runs and 12.0–12.8V when off.
- Inspect the inline fuse (3–5A typical) for continuity. Replace with identical type and rating.
- Check ground continuity: between device ground and chassis should read near 0Ω. Anything above 0.5Ω means a weak ground.
- Confirm polarity before reconnecting; reverse polarity destroys internal circuits instantly.
Installer Insight: Over 60% of devices returned under “defect” were traced to poor grounding or reversed polarity, not faulty hardware.
2. LED Codes & Basic Status Indicators
LED patterns tell you almost everything.
|
LED |
Pattern |
Meaning |
|
Power |
Steady |
Device powered correctly |
|
GPS |
Blinking |
Searching for a fix |
|
GPS |
Solid |
GPS locked |
|
Cellular |
Blinking / Solid |
Registering / Connected |
If all LEDs remain dark after confirming voltage, suspect either a blown internal fuse or hardware failure. Document LED behaviour, use timestamped photos or a short clip for support records.
Transition: Once power and LED activity check out, the next question is whether the device can talk to the network.
3. Cellular Connectivity & APN Verification
A tracker may power on but still fail to transmit. That’s almost always a SIM or APN issue.
- Verify the SIM card is active, has data, and has no PIN lock.
- Confirm the APN (Access Point Name) matches the carrier’s exact string; a single typo stops data flow.
- From a laptop or secondary device on the same network, run a ping test to your platform hostname. Repeated packet loss means a network or APN configuration problem.
- In the device dashboard, check signal strength (RSSI). Anything below −100 dBm causes frequent drops and delayed reporting.
Pro Tip: If you’re using an MVNO SIM, test with a direct carrier SIM for comparison; differences often highlight routing or latency problems.
4. GNSS Diagnostics - Satellite Locks & Accuracy
Once cellular is confirmed, focus on positioning.
- Verify the number of satellites in view, aim for 4–6+ locks for accuracy.
- Check HDOP (Horizontal Dilution of Precision); anything under 2 means strong geometry, while >5 indicates poor positioning.
- Record TTFF (Time to First Fix). Cold starts should take 30–120 seconds. If it exceeds that, inspect antenna placement and check for nearby metal shielding or EMI sources.
Installer Example: Relocating a tracker antenna just 4 inches from under a steel brace to a plastic dash cavity cut TTFF from 85 seconds to 18 seconds. Small moves make big gains.
5. Logs, Serial Output & Export

Logs tell the story when live data doesn’t.
- Pull logs via the manufacturer’s app, web dashboard, or serial console.
- Scan for repeated reboot cycles, “no SIM,” or GNSS error strings.
- Export data in CSV or plain text format and note the timestamp of the last valid fix.
-
For advanced users, review NMEA sentences, valid $GPGGA or $GPRMC entries to confirm proper satellite communication.
Pro Tip: Keep a standard log folder per vehicle. Consistent naming (IMEI + date) significantly speeds up troubleshooting in fleet environments.
6. Advanced Tests & Mitigation
When basic checks fail, move into controlled isolation tests.
- Swap the SIM into a known-good tracker to separate device vs network issues.
- Place the unit outdoors under open sky to rule out antenna or interference faults.
- If the device supports firmware updates, load the latest stable release from the vendor. Always back up settings before flashing.
Field Insight: Firmware updates fix over half of persistent dropouts and false “offline” alerts.
7. When to Escalate - Vendor Support or Replacement
After completing all diagnostic steps, escalate only if the issue remains. Support teams expect proof before authorising RMA, so come prepared with:
- Device IMEI / Serial number
- Firmware version
- LED behaviour photos
- Last successful timestamp
- Exported logs
- List of steps already completed
- Short video showing the current LED pattern
These details speed up warranty processing and improve success rates for replacements.
Final Tip
Document every test. Take timestamped photos, record voltage readings, and keep brief notes. A clear paper trail doesn’t just help vendor support, it builds your reputation as a professional installer who diagnoses with precision, not guesswork.
Conclusion: Choose the Right GPS Tracker Installation Method
A tracker’s performance depends entirely on how it’s installed. Power stability, signal strength, and mounting all decide whether your data stays accurate or drifts when it matters most.
Plug-and-play OBD-II units suit everyday drivers who value speed and flexibility. Plug in, connect, and you’re tracking in under a minute.
Hardwired systems remain the gold standard for fleets and long-term users who need uninterrupted uptime and tamper resistance.
Magnetic trackers offer unmatched mobility, making them perfect for rentals, shared vehicles, and short-term monitoring.
The choice comes down to how permanent the setup needs to be and how much control you want over installation. Follow the verified steps in this guide for clean wiring, reliable power, and precise antenna alignment, or let a professional handle the install to guarantee warranty compliance and signal accuracy.
You followed the full install checklist. Now choose a tracker that rewards that care.
Why choose SpaceHawk after this install guide
- Zero subscription fees: predictable cost of ownership (one payment, no recurring surprises).
- Verified field performance: sub-3m portable accuracy, multi-week battery on magnetic units, and hardwired stability in fleet rolls.
- Ready-to-install resources: downloadable quick-sheet, LED diagnostic table, and wiring diagrams included with every purchase.
- Shop & support: live installer locator and step-by-step activation support for first-time setups.
Author Disclosure
Written by Ryan Horban, GPS Tracking Expert (15+ Years of Experience)
Over the past 15 years, I’ve helped everyone from parents and pet owners to fleet managers and small business teams choose GPS solutions that actually work.
Whether it’s tracking a car, a child, or an entire fleet, my focus is on simple, legal, and effective setups that protect what matters, without the tech headaches.
I’ve worked hands-on with real users, tested dozens of devices, and know what truly works in the real world.
👉 Connect with me on LinkedIn →
Frequently Asked Questions
Where is the best place to put a magnetic GPS tracker on a car?
The best place to put a magnetic GPS tracker on a car is a flat, clean metal surface that keeps the device secure and hidden while still allowing a clear satellite view. Ideal mounting spots include the frame rail, rear bumper beam, or under the trunk floor pan, areas that stay dry, stable, and out of direct sight. Before attaching, always clean the surface with alcohol or degreaser to remove dust and oil, ensuring the magnet grips firmly even during vibration or high-speed driving.
Keep the antenna side facing down or outward, giving the tracker an unobstructed line to the sky for accurate positioning. Avoid placing it near exhaust pipes, mufflers, or thick metal shields that can block GPS and cellular signals. A strong mount here guarantees your tracker remains discreet, weather-protected, and delivers precise, uninterrupted tracking data.
Is installing a GPS tracker legal?
Yes, if you own or have explicit consent to track the vehicle. Private individuals cannot legally track someone else’s car without permission. Businesses may track company vehicles with written employee consent and clear data-use policies.
Can I hardwire a GPS tracker without cutting factory wires?
Yes, you can hardwire a GPS tracker without cutting factory wires by using a fuse-tap adapter (add-a-circuit). This tool lets you safely draw power from the fuse box without damaging the original wiring.
Just remove a fuse connected to an ignition or constant circuit, insert the fuse tap, and connect your tracker’s power lead. The original fuse remains protected while your new circuit powers the device.
This clean method keeps your warranty intact, avoids messy splicing, and makes removal easy if you sell or upgrade your vehicle.
How long does a GPS tracker battery last?
Battery life depends on update rate, signal strength, and motion detection settings. Portable GPS units usually last 1–3 weeks per charge, while magnetic trackers with smart power-saving modes can operate for 2–6 months on a full battery. In contrast, hardwired GPS trackers draw constant power from the vehicle, meaning they never require recharging and deliver uninterrupted tracking.
- Portable trackers: 1–3 weeks of battery life per charge.
- Magnetic trackers: 2–6 months with motion or sleep mode enabled.
- Hardwired trackers: continuous power supply, no recharging needed.
- Battery longevity improves when update intervals are increased (e.g., 30–60 seconds).
- Extreme temperatures and weak signals can reduce battery performance over time.
Does a GPS tracker affect airbags or vehicle electronics?
No, when wired correctly. Trackers use milliamps of current and don’t interface with airbag circuits. Always avoid yellow connectors or harnesses, which belong to the SRS (airbag) system, and disconnect the battery before installation.
- Choosing a selection results in a full page refresh.
- Opens in a new window.