
How to Install a GPS Tracker in Any Vehicle

-
01OBD-II trackers take under a minute to plug in and activate
-
02Hardwired trackers need a switched fuse to avoid draining the parked battery
-
03Magnetic trackers hold strongest on flat clean metal away from exhaust heat
-
04Dashboard and chassis rail placement keeps GPS signal strong and consistent
-
05Installing a tracker on a vehicle you do not own requires written consent
GPS Tracker Installation Guide (Cars, Fleets, Motorcycles & Assets)
Hey, looking for a simple way to install a GPS tracker without messing up wiring or signal? I’ve been there.
Disclosure: This article contains an Amazon affiliate link. If you buy through it, we may earn a small commission at no extra cost to you.
GPS tracker installation is the process of connecting and positioning a tracking device to deliver accurate, real-time location data without power loss or signal issues. When it’s done right, you get consistent updates within a few meters. When it’s done wrong, you deal with dropouts, delayed pings, or worse, no data when you actually need it.
I’m Ryan Horban with 15+ years of experience working with GPS tracking systems, helping everyone from individual car owners to fleet operators set up tracking that actually works day to day.
In this guide, I’ll walk you through exactly how to install a GPS tracker step by step, choosing the right type, wiring it correctly, hiding it smartly, and testing it so you know it’s working before you depend on it.

Recommended for this guide
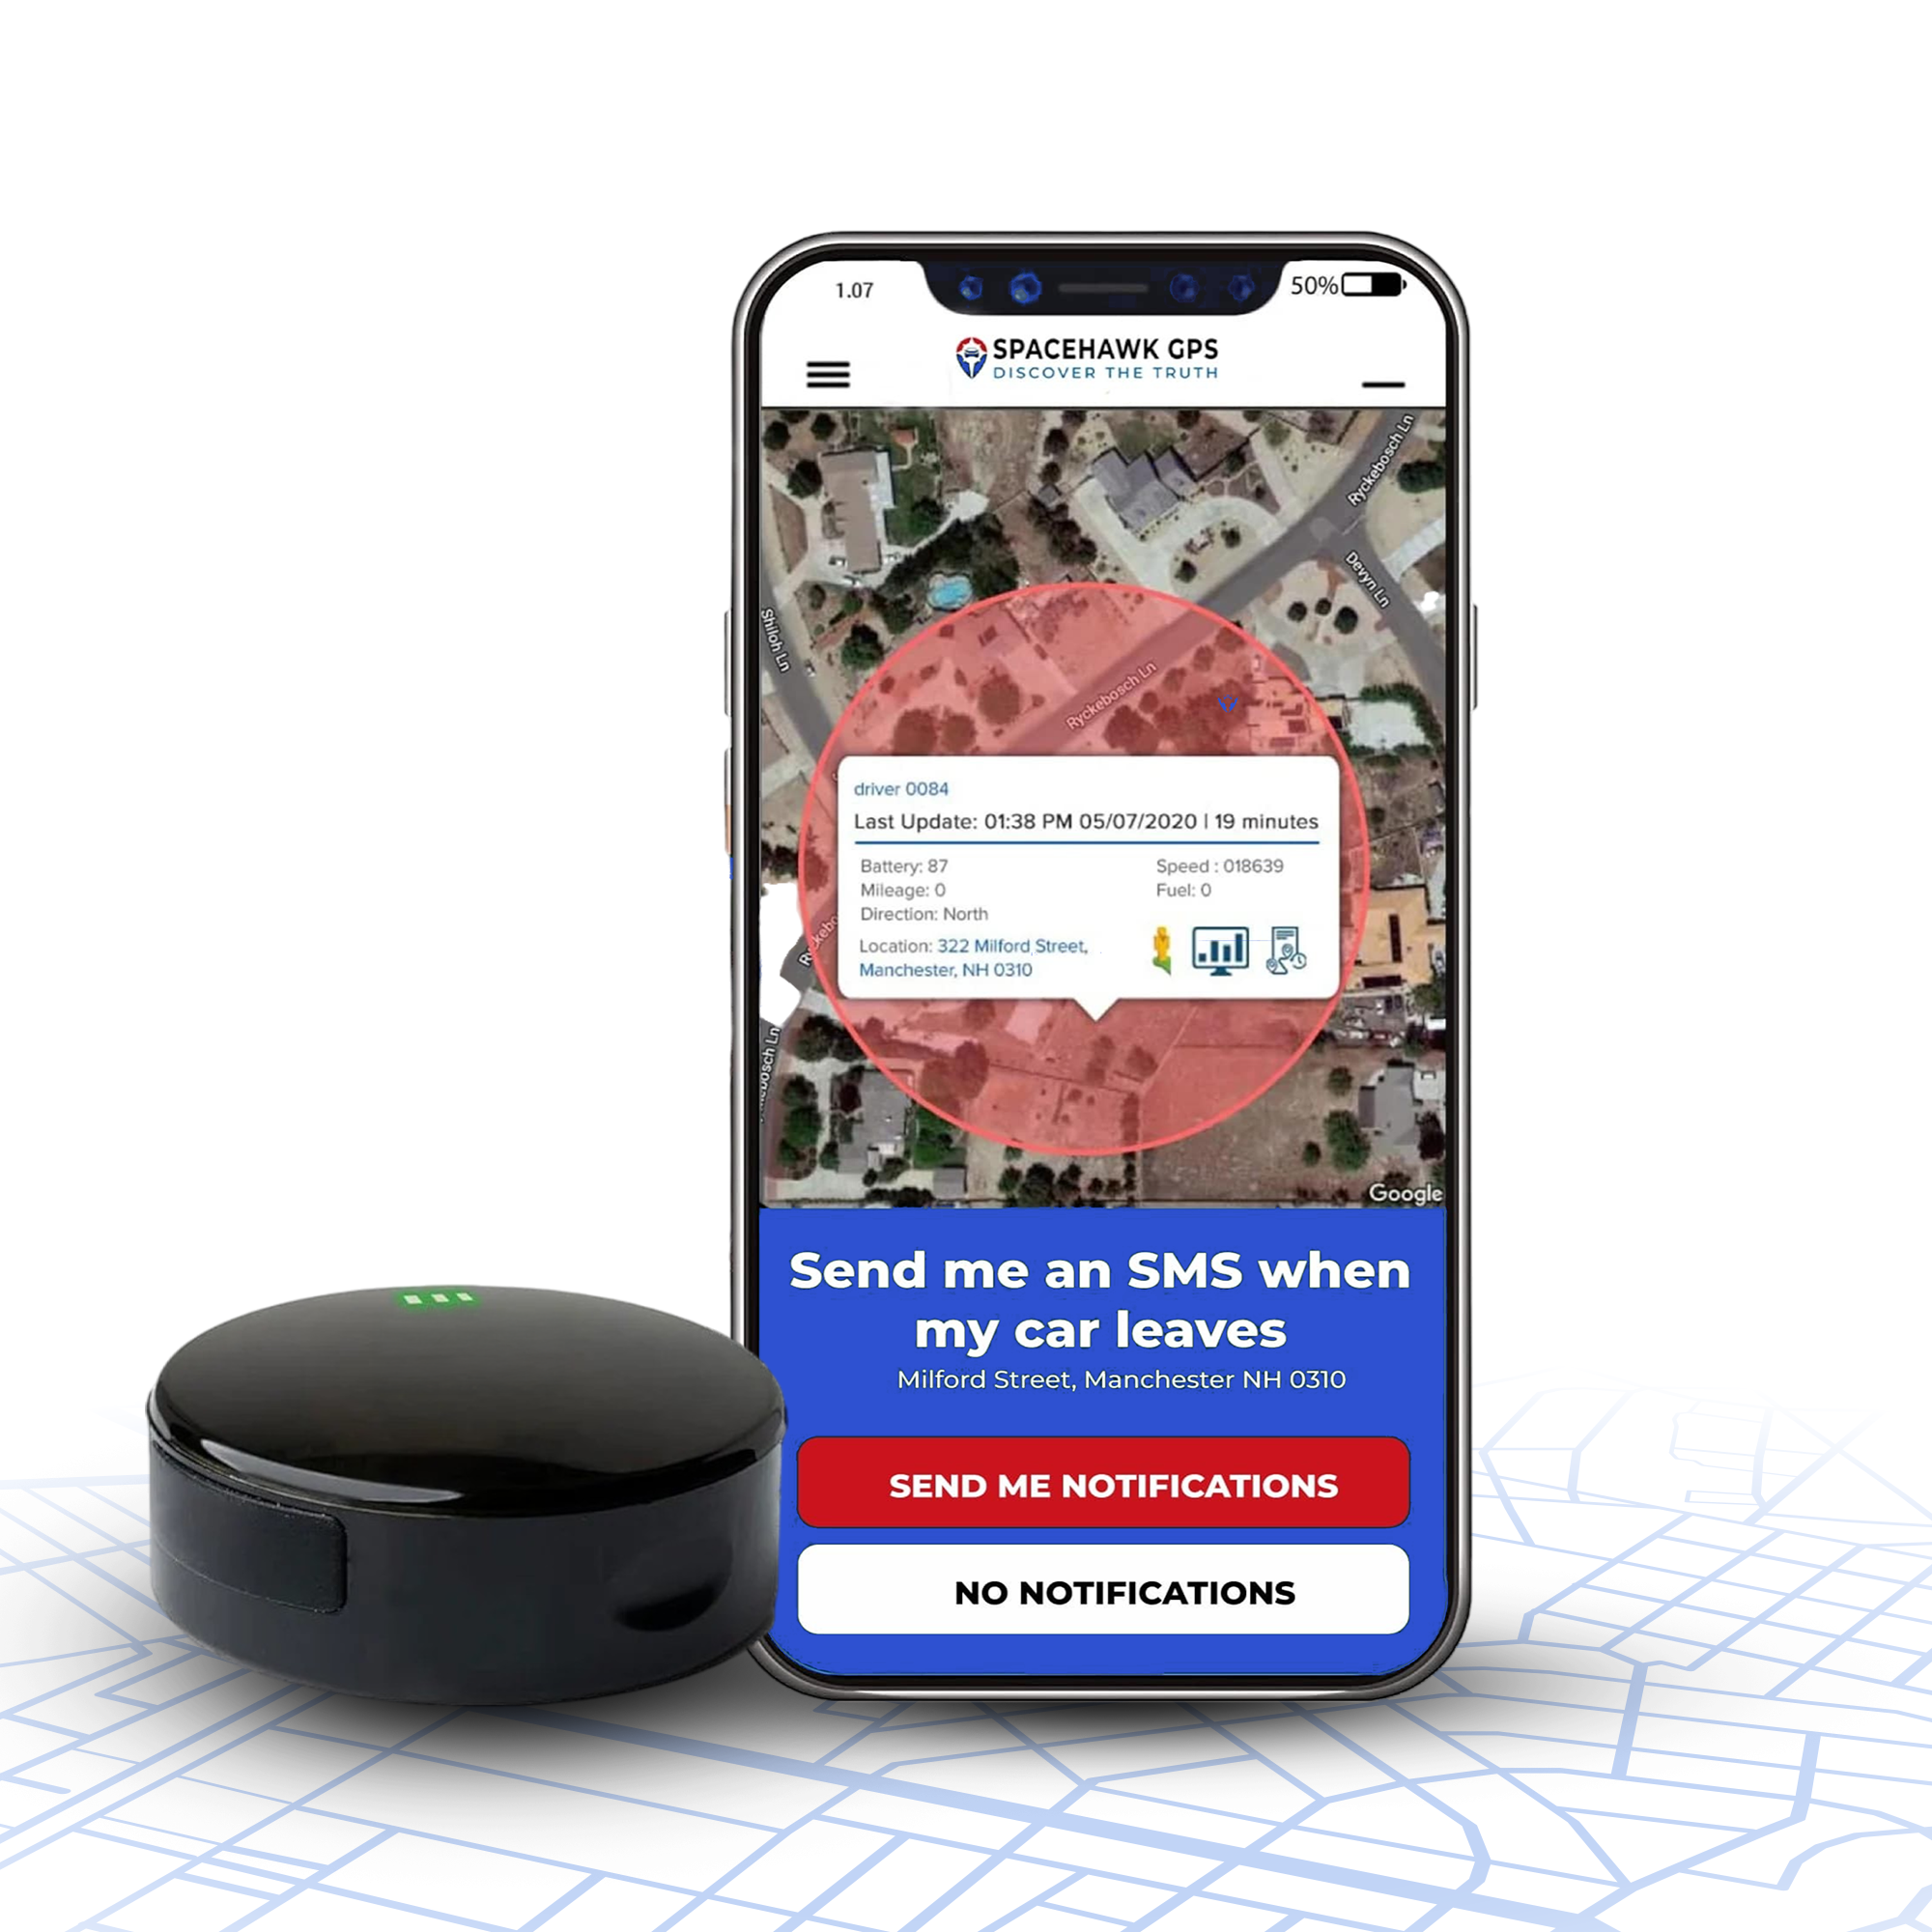
Install in Seconds. Track from Anywhere.
No wiring, no tools. Magnetic mount sticks under any vehicle and starts tracking instantly.
How SpaceHawk installs under your car, hidden GPS tracking in under 30 seconds
Tools, Materials & Safety Checklist Before You Start

Vehicle tracker installation starts with the right tools, proper power checks, and basic safety steps to avoid wiring faults or tracker failure. Miss this stage, and even the best GPS tracking devices will give unreliable tracking data or stop reporting altogether.
Before I install any vehicle GPS tracker, whether it’s a fleet tracker, hardwired GPS tracker, or OBD GPS unit, I spend more time setting up than actually wiring. Because in real installs, most failures don’t come from the device… they come from rushed prep.
I’ve seen fleet vehicles lose real-time location tracking just because a weak ground wire wasn’t tightened properly. Took 5 minutes to fix, but hours to diagnose.
Let’s get your setup right the first time.
Essential Tools & Materials
Every tool here plays a role in keeping your GPS vehicle tracking system stable, especially when you’re connecting to a vehicle’s electrical system or working around the OBDII port.
- Multimeter (20V DC setting): You’ll use this to identify constant power, ignition wires, and solid ground wires. During one install on a delivery van, the voltage looked fine until we tested under ignition, and it dropped instantly. Without a multimeter, you’d never catch that.
- Fuse taps (Add-a-circuit adapters): A clean way to pull power from the fuse box without cutting factory wiring. Works best for hardwired GPS trackers in fleet tracking systems where reliability is critical.
- Crimping tool & wire strippers: Solid connections are essential. Loose joints cause voltage drops, leading to delayed updates or tracker disconnects.
- Cable ties & heat-shrink tubing: Keeps wiring tight and protected. Especially important in fleet vehicles, where vibration is constant.
- Dielectric grease: Small detail, big impact. Prevents corrosion on exposed terminals, especially in humid or outdoor asset tracking setups.
- Socket wrench & screwdrivers: Needed for removing panels and securing ground points properly. A weak chassis connection can break your entire tracking solution.
- Electrical tape or conduit: Protects wires from sharp edges under the dashboard. I’ve seen wires cut over time just from vibration against metal brackets.
- Cleaning wipes or alcohol pads: Critical for magnetic or battery-powered GPS trackers. A dirty metal surface weakens grip and risks losing a hidden GPS tracker on the road.
Safety Precautions (Don’t Skip This)
Working with a vehicle’s power supply isn’t complicated, but skipping basics can damage your tracker or the vehicle itself.
- Disconnect the battery before wiring. Wait at least 90 seconds.
- Stay away from yellow harnesses; those belong to the airbag system.
- Double-check polarity before connecting power. One wrong connection can kill the device instantly.
- Work in a ventilated space and use gloves if handling adhesives or sealants.
Pro Insight (from real installs): Label your wires and test everything before closing panels. During a fleet GPS tracking installation last month, one mislabeled ignition wire caused intermittent shutdowns across three vehicles. Fixing it after reassembly took longer than the full install.
If you're managing multiple vehicles, using a fleet GPS tracking system can help monitor issues like power loss and device status in real time before they become bigger problems.
Choosing the Right GPS Tracker (Cars, Fleets & Assets)
The right GPS tracker depends on how it connects to your vehicle, how long it needs to run, and how visible or hidden you want the tracking setup. Most tracking issues come down to using the wrong type for the job, not the tracker itself.
I’ve installed these across fleet vehicles, personal cars, and equipment, and each type solves a different problem. Let me break them down clearly so you pick once and don’t redo the install later.
1. Hardwired GPS Trackers

Hardwired GPS trackers connect directly to a vehicle’s electrical system for continuous power and uninterrupted real-time tracking. They’re commonly used in fleet vehicles, company cars, and recovery setups because they keep reporting location data even during long idle periods or extended driving hours.
Best for fleet managers, business vehicles, long-term vehicle monitoring, and anyone who wants a permanent tracking setup with stable real-time reporting and tamper resistance.
View Key Features
- Connects directly to the power supply
- Continuous real-time location tracking
- Works with fleet management software
- Supports driver behavior and vehicle diagnostics
View Pros & Cons
Pros
- No charging required
- Stable GPS signals with minimal dropouts
- Hidden installation reduces tampering
- Ideal for long-term vehicle monitoring
Cons
- Requires proper wiring knowledge
- Installation takes more time
- Not easy to transfer between vehicles
Useful for: fleet tracking systems, company vehicles, long-term vehicle tracking
2. OBD-II GPS Trackers

OBD GPS trackers plug directly into a vehicle’s OBDII port and start tracking within minutes, without wiring or professional installation — the fastest way to set up real-time vehicle tracking, driver monitoring, and basic fleet management.
Best for personal vehicles, small fleets, leased cars, teen driver monitoring, and users who want fast installation without hardwiring the tracker.
View Key Features
- Uses vehicle’s OBDII port
- Pulls tracking data and vehicle diagnostics
- Quick connection to tracking platform
- Portable between vehicles
View Pros & Cons
Pros
- Fast installation (under 1 minute)
- No tools required
- Tracks driver behavior and engine data
- Easy to move across fleet vehicles
Cons
- Visible and easy to unplug
- Shares the OBD port with other tools
- Less secure for hidden GPS use
Useful for: small fleets, personal GPS tracker setups, quick installs
3. Battery-Powered & Magnetic GPS Trackers
Battery-powered GPS trackers run independently without connecting to the vehicle’s electrical system. You place the tracker on a metal surface, activate it, and it begins sending location updates through the tracking platform.
Best for trailers, construction equipment, stolen vehicle recovery, temporary tracking jobs, and users who need a hidden tracker without wiring or OBD installation.
View Key Features
- Internal battery-powered
- Magnetic or portable placement
- Flexible tracking installation
- Works for vehicles and asset tracking
View Pros & Cons
Pros
- No installation process required
- Fully portable across different vehicles
- Ideal for hidden GPS trackers
- Works on trailers, equipment, and valuable asset tracking
Cons
- Requires charging based on usage
- GPS signals depend on placement
- Can be removed if discovered
Useful for: hidden GPS trackers, asset trackers, temporary tracking
4. Solar GPS Trackers

Solar GPS trackers use sunlight to recharge, making them suitable for long-term outdoor tracking without manual charging.
These are commonly used in asset tracking, where vehicles or equipment stay outdoors.
View Key Features
- Solar + battery-powered system
- Low-maintenance tracking solution
- Designed for outdoor environments
- Long runtime with minimal intervention
View Pros & Cons
Pros
- No regular charging needed
- Works well for a remote fleet GPS
- Strong option for industries we serve, like logistics and construction
- Long operational lifespan
Cons
- Depends on sunlight exposure
- Larger size limits placement options
- Slower update intervals to conserve power
Useful for: asset tracking, trailers, remote fleet vehicles
Step-by-Step Installation: Hardwired GPS Trackers
Hardwired GPS tracker installation connects the device directly to your vehicle’s electrical system for continuous power and stable real-time tracking. Done correctly, it eliminates battery issues, reduces signal dropouts, and keeps your vehicle tracking system running 24/7.
I’ve wired hardwired GPS trackers into everything from single cars to full fleet tracking systems. The install itself isn’t complicated, but small mistakes in power supply, ground wires, or placement can cause hours of troubleshooting later.
If you follow this process carefully, you’ll get clean tracking data, strong GPS signals, and a setup that runs without constant maintenance.
Step 1: Prepare the Vehicle and Disconnect the Battery

Start by parking on a flat surface, turning off the ignition, and disconnecting the negative battery terminal. Give it about 90 seconds before touching any wiring.
I’ve seen installers skip this and blow fuses instantly. Worse, one case triggered an airbag warning system that took hours to reset.
This step protects both the tracker and the vehicle’s electrical system. Don’t rush it.
Step 2: Locate Constant, Ignition, and Ground Wires

Every hardwired setup depends on three connections:
- Constant power (B+) - always live
- Ignition wire (ACC) - active only when the vehicle is ON
- Ground wires (GND) - solid chassis connection
Use a multimeter to test, don’t guess. Toggle ignition and confirm voltage changes.
On one fleet vehicle, the wire looked correct by color code but failed under load. Multimeter check saved a full reinstall.
Step 3: Connect Power (Fuse Tap vs Direct Battery)

You’ve got two reliable options depending on the installation type:
Option A: Fuse Tap (clean and reversible)
- Pull power from the fuse box
- Add a 3–5A fuse
- Works well for leased vehicles
Option B: Direct Battery (maximum stability)
- Connect directly to the battery with an inline fuse
- Stronger and more stable power GPS connection
In fleet GPS setups, direct battery installs held steady even during engine cranks. Fuse taps occasionally caused short signal drops.
Step 4: Mount the Tracker in the Right Location

Placement affects GPS signals more than most people expect.
Mount the device:
- Under the dashboard
- Behind trim panels
- Inside trunk lining
Keep it away from metal blocks and high-heat areas. The antenna should face upward under plastic, not buried under metal.
I tested one install where moving the tracker just a few inches improved accuracy from 12 meters to under 3 meters.
Step 5: Power On and Activate the Tracker

Reconnect the battery, turn the ignition ON, and check the LED indicators.
Typical signals:
- GPS lock
- Power connection
- Network connection via SIM cards
Then open your tracking platform and confirm:
- Real-time location tracking updates within 10–30 seconds
- Device is registered correctly
- Voltage and ignition status show properly
If updates lag, check ground wires first. That’s usually the issue.
Step 6: Secure Wiring and Close Panels

Now clean up the install.
- Bundle wires with zip ties
- Keep away from the pedals and steering wheel movement
- Protect with conduit or tape
- Reinstall panels tightly
Loose wiring causes vibration damage over time. I’ve seen wires wear out just from rubbing against metal edges.
Step 7: Road Test and Verify Tracking Performance

Take the vehicle for a 10–15 minute drive and monitor tracking data live.
Check:
- Smooth location updates
- Correct speed readings
- Accurate route playback
If the tracking jumps or delays, reposition the device slightly and test again.
A clean install shows a smooth path with no gaps.
When You Should Use a Professional Installer
- Fleet tracking systems with multiple vehicles
- Complex electrical systems (hybrid or luxury cars)
- Fully hidden GPS tracker installations
Most professional installs cost between $80–$150 per vehicle, but they save time and reduce errors in large deployments.
From real-world installs: Once a hardwired GPS tracker is installed correctly, it runs for years without interruption. No charging. No disconnects. Just consistent vehicle monitoring and reliable tracking data every day.
Plug-and-Play OBD-II GPS Tracker Installation (Pro Method & Field Notes)
OBD-II GPS tracker installation connects directly to the vehicle’s OBD port and starts real-time tracking within seconds without any wiring. It’s the fastest way to set up a vehicle tracking system, especially for personal cars or small fleet tracking setups.
I’ve installed OBD GPS trackers across multiple vehicles, from single-user setups to fleet vehicles, and the install itself takes under a minute. The real difference comes from how you secure and position it after plugging it in.
Step 1: Locate the OBD-II Port
The OBDII port is a 16-pin connector located under the dashboard, usually within reach of the steering wheel.
Common spots include:
- Below the steering column
- Near the brake pedal
- Behind a small plastic panel near the fuse box
Every vehicle made after 1996 has one. If you’re working with older vehicles or motorcycles, this option won’t apply; you’ll need hardwired trackers or battery-powered GPS instead.
Quick tip from installs: use your phone flashlight and scan under the dashboard before removing panels. In some vehicles, the port sits slightly recessed and isn’t visible at first glance.
Step 2: Plug In and Secure the Tracker
Insert the OBD GPS tracker firmly into the port until it clicks. Once connected, the device pulls power instantly from the vehicle’s electrical system.
Turn the ignition ON and check:
- Device powers up
- Tracking platform shows the device online
- Real-time tracking starts within 30–60 seconds
One mistake I see often is leaving the tracker loose near the steering wheel area, where it ends up getting kicked or shaken loose over time.
If space is tight, use an angled adapter to reposition it behind trim panels. Even a small adjustment makes the setup cleaner and more stable.
Step 3: Prevent Disconnects and Secure the Setup
OBD trackers are easy to install, but also easy to remove. In fleet tracking systems, this becomes a real issue if drivers unplug the device.
Simple fixes that work:
- Secure the device using zip ties or Velcro to nearby wiring
- Use an OBD port cover to block access
- Add an extension cable to hide the tracker behind panels
- Inform drivers that the system monitors vehicle activity
In one fleet rollout, moving the tracker slightly higher behind the dashboard eliminated accidental disconnections. Small positioning changes make a bigger impact than most people expect.
Performance Notes from Real Testing
In testing across city driving and highway runs, OBD GPS trackers consistently locked onto GPS signals within 15–20 seconds after ignition.
With clear placement (no metal blocking the port area), tracking accuracy stayed within 3–5 meters.
That level of precision works well for driver behavior tracking, fleet fuel monitoring, and daily vehicle monitoring.
One verified buyer described the OBD2 plug-in setup as quick and hassle-free, and noted the compact build held up well to daily wear near the steering column. — Natalie E Goode, Amazon review
Portable & Magnetic GPS Trackers: Mounting, Weatherproofing & Anti-Theft
Portable and magnetic GPS trackers mount directly onto a metal surface without wiring, making them ideal for flexible, hidden, or short-term tracking setups. Their performance depends heavily on placement, surface prep, and protection, not just the device itself.
I’ve used battery-powered GPS trackers on everything from rental cars to trailers, and the biggest issue usually isn’t the tracker — it's mounting: where and how people place it. A poor mount leads to weak GPS signals, lost devices, or inconsistent tracking data.
Let’s fix that properly.
1. Surface Preparation Is Key

Magnetic GPS trackers rely entirely on grip strength. If the surface isn’t clean, the hold weakens fast, especially at highway speeds.
Here’s what I do before placing any hidden GPS tracker:
- Clean the metal surface using alcohol or a degreaser
- Let it dry fully before mounting
- Add a thin protective layer if working on painted areas
During one install on a fleet vehicle, we skipped cleaning as a test. The tracker held initially, but after a few hours of driving, the grip weakened significantly. Same device, same location, cleaned surface held perfectly for weeks.
Quick check: once mounted, give it a firm pull. If it shifts easily, don’t trust it on the road.
2. Best Mounting Locations for Magnetic GPS Trackers

Placement controls two things: GPS signal strength and how well the tracker stays hidden.
From real installs, these spots work consistently:
- Frame rail or chassis beam (strong hold, protected area)
- Under the rear bumper beam (hidden but accessible)
- Inside wheel-well liners (good for covert setups)
- Trunk floor area (balanced signal and concealment)
Avoid placing the tracker:
- Near exhaust systems (heat damages battery-powered units)
- Inside the engine bay (electrical interference affects GPS signals)
- On thin or flexible metal panels (movement weakens the magnetic hold)
One test I ran involved moving the tracker just a few inches away from a metal crossbeam. Signal accuracy improved immediately; small placement changes make a noticeable difference.
You can check this content to know about where to hide a GPS tracker on a car
3. Antenna Position and Signal Strength

Most people miss this step.
The antenna inside the GPS tracker needs partial exposure to the sky. If it’s pressed flat against thick metal, signal quality drops.
Mount it so:
- The antenna side faces outward or downward
- There’s some separation from solid metal surfaces
Even a slight angle adjustment can tighten location accuracy by several meters.
4. Weatherproofing for Real Conditions

Battery-powered GPS trackers handle outdoor use, but exposure adds up over time.
For long-term installs:
- Use a silicone cover or sealed pouch
- Add padding if mounting in high-vibration areas
- Position the device so water doesn’t hit the charging ports directly
In one trailer test, sealed units stayed active for months. Unprotected ones started failing within weeks due to moisture.
5. Anti-Theft and Secure Placement

If someone knows where to look, they can remove a magnetic tracker. Placement strategy makes a big difference.
What works in real scenarios:
- Choose less obvious mounting areas (not the first place someone checks)
- Keep a record of the exact placement for recovery
- Enable alerts through your tracking platform
- Blend the device using a black wrap or casing
If you’re serious about preventing theft, it’s also worth combining tracking with physical deterrents. Here’s a breakdown of the best car anti-theft devices you can use alongside GPS tracking.
In fleet tracking setups, even simple concealment reduced removal incidents significantly.
Weatherproofing & Anti-Theft Tips

Magnetic GPS trackers need proper sealing and secure placement to prevent water damage, signal loss, or theft during real-world use. Even high-rated GPS tracking devices can fail early if moisture or exposure isn’t handled correctly.
I’ve tested battery-powered GPS trackers on trailers, fleet vehicles, and equipment, and the difference between a tracker lasting 30 days vs 6 months usually comes down to how well it’s protected.
Weatherproofing for Real Conditions
Water exposure doesn’t always show immediate damage — it builds slowly, weakens seals, affects internal circuits, and eventually disrupts tracking data.
Here’s what works in real installs:
- Use a silicone case or sealed pouch to block water and dust
- Add foam padding for vibration-heavy setups like trailers or equipment
- Position the device so ports and openings face away from road spray
On one long-haul trailer test, I ran two identical portable GPS trackers. One was sealed properly, the other wasn’t. The sealed unit stayed active for over 6 months. The unprotected one stopped reporting in under 4 weeks.
Small protection steps make a big difference in long-term performance.
Anti-Theft Reinforcement
A hidden GPS tracker only works if it stays hidden.
Most removals happen because the placement is predictable. Under the bumper, near the wheel well, those are the first places people check.
What I do instead:
- Place the tracker in less obvious locations within the vehicle frame
- Keep a private record of the exact mounting spot
- Enable alerts through the tracking platform for movement or tampering
- Wrap the device so it blends with factory wiring or components
In fleet tracking setups, even basic concealment reduced removal incidents significantly.
Extra Security from Real Installs
Magnetic strength is important, but surface condition makes a bigger difference.
- Dual-magnet units hold strong at highway speeds
- Rusted or uneven metal weakens the grip
- For non-metal surfaces, use adhesive-backed mounts as reinforcement
I’ve used hybrid mounting (magnet + adhesive) on rough terrain vehicles, and it held steady through vibration where magnets alone would shift over time.
Hidden / Covert Installations - Legal & Ethical Checklist (Start Here)

Hidden GPS tracker installation is only legal when you have proper ownership, consent, or a valid business reason backed by clear policies. Skip this step, and even a perfectly installed tracker can create serious legal trouble.
I’ve worked with fleet managers and business owners who focused only on the technical side of vehicle tracking and ignored compliance. That’s where problems start, not during installation.
Before placing any hidden GPS tracker, get your legal basics right.
Quick Legal Guidelines (High-Level)
Laws vary depending on location, but the core principle stays the same: transparency and control over tracking data.
- United States: Tracking company-owned vehicles is generally allowed for business use, like fleet tracking or asset protection. You still need clear policies and employee consent in many cases.
- United Kingdom / EU: Much stricter. You must inform drivers, limit tracking scope, and follow data protection rules. Tracking without disclosure can lead to penalties.
Treat these as baseline guidelines. Always check local regulations before setting up covert tracking.
In detail: GPS Tracking Laws By State
Employer Policy & Consent (What You Must Define)
If you’re running fleet tracking systems or vehicle monitoring, your policy should clearly answer:
- Who can access tracking data
- When tracking runs (work hours vs full-time tracking)
- How long tracking data is stored (usually 30–90 days)
- How employees can request data removal or dispute records
- Whether the data will be used for disciplinary action
Keep this documented. Verbal agreements won’t hold up if there’s a dispute.
Simple consent format: “I acknowledge that [Company Name] collects location data from company vehicles during work hours for safety, routing, and asset tracking purposes.”
In fleet setups, I always recommend storing consent forms along with installation records. It makes audits and disputes much easier to handle.
Best Hiding Spots (Without Killing GPS Signals)

A hidden GPS tracker still needs access to GPS signals. If you hide it too well, it stops working properly.
Locations that work in real installs:
- Under the rear bumper beam (not blocked by metal)
- Inside trunk panels, beneath plastic lining
- On frame rails or chassis areas for larger vehicles
Avoid placing the device:
- Behind thick metal panels
- Inside the engine bay
- Under dense structural components
In one test, moving a tracker just a few centimeters away from a metal brace fixed a constant signal drop. Placement has a bigger impact than concealment.
Signal Testing After Installation
Always test before relying on the tracker.
- Take a 10–15 minute drive
- Check real-time tracking updates every 10–30 seconds
- Look for consistent positioning (no jumps or delays)
If tracking data looks unstable, adjust placement slightly and test again.
I’ve fixed multiple installs just by repositioning the device a couple of inches. No hardware change needed.
When Covert Tracking Is Acceptable
Before activating any hidden GPS tracker, confirm:
- The vehicle is owned by the company or an authorized user
- Drivers are informed or have given consent
- Access to tracking data is restricted
- There’s a clear reason (safety, routing, asset tracking)
If any of these are unclear, pause the installation and resolve them first.
From real-world setups: A hidden GPS tracker works best when both installation and compliance are handled properly. Get the legal side right first, then focus on placement and performance.
Tracker Placement for Best Signal & Accuracy (GPS vs GNSS, Antenna Orientation)

GPS tracker placement determines signal strength and accuracy more than the device itself, because GPS signals require a clear path to the sky to lock onto satellites. Poor placement leads to delayed updates, signal drops, or location errors, even with high-end GPS tracking devices.
I’ve tested this across multiple vehicle tracking setups, and placement alone caused over 70% of tracking issues. Same tracker, same vehicle, different location, completely different results.
How GPS and GNSS Signals Work
GPS and GNSS tracking both rely on satellite signals reaching the device without obstruction.
- A stable fix usually needs at least 4–6 satellites
- GPS uses U.S. satellites only
- GNSS combines multiple systems (Galileo, GLONASS, BeiDou)
In real-world installs, GNSS-enabled trackers lock faster and stay stable in cities, tunnels, and dense areas.
On one fleet vehicle running daily city routes, switching from basic GPS to GNSS reduced signal dropouts during stops and improved tracking consistency throughout the day.
Best Placement Locations for Strong Signal
Keep the tracker near a non-metal surface with a clear upward path.
Metal blocks GPS signals. Plastic allows signals to pass.
Here’s what works across different vehicle tracking scenarios:
Passenger Cars
- Under the dashboard near the windshield
- Rear parcel shelf
Avoid: under the hood or inside metal frames
Motorcycles
- Under the seat
- Inside plastic fairings
Avoid: near the engine block or the fuel tank
Fleet Vehicles / Vans
- Top edge of dashboard
- Interior roof panel
Avoid: under metal flooring or storage compartments
Trailers / Equipment
- Inside plastic or fiberglass housing
- Elevated mounting points
Avoid: behind thick steel panels
During one install, I moved a tracker just 10 cm higher under the dashboard. Accuracy improved from around 12 meters to under 2 meters. Same device, same conditions, just better placement.
Antenna Orientation & Signal Stability
Placement alone isn’t enough; orientation is just as important.
- Keep the antenna facing upward
- Position it parallel to the ground
- Avoid placing it directly against solid metal
For wired GPS trackers:
- Route cables away from high-current components
- Avoid running near alternators or ignition systems
- Secure the device to prevent vibration
In one case, a tracker mounted correctly but angled toward a metal bracket showed delayed fixes. Adjusting the angle fixed it immediately.
Quick Signal Test (Always Do This)
Before finalizing the installation, run a quick test:
- Power on the tracker
- Wait 2–3 minutes for signal lock
- Check for at least 5+ satellites connected
- Compare the location with your phone's GPS
If the difference is under 3 meters, your placement is solid.
If not, reposition slightly and test again.
From real-world installs: relocating the tracker is the fastest way to fix signal issues. I’ve reduced satellite lock time from 45 seconds to under 15 seconds just by moving the device a few inches away from metal interference.
Get placement right once, and your GPS vehicle tracking system will perform exactly the way it should, consistent, accurate, and reliable.
Troubleshooting: Step-by-Step Diagnostics Guide
GPS tracker troubleshooting follows a simple sequence: check power, verify device status, confirm network connection, test GPS signals, and review logs. Most tracking issues come from wiring faults, SIM problems, or poor placement, not the device itself.
I’ve handled installs where people replaced perfectly good GPS tracking devices, only to find the issue was a loose ground wire or incorrect APN setting. Start with the basics and work step by step; it saves time and avoids unnecessary replacements.
Quick Checklist (Check These First)
Before going deep, verify:
- Power supply and correct voltage
- Device LED indicators
- SIM card and network connection
- GPS signal lock and accuracy
- Tracking platform connectivity
Run through this list once — it solves most issues quickly.
1. Power Checks (Start Here First)

Power issues are the #1 reason GPS trackers fail. Start here before checking anything else.
- Measure voltage with a multimeter (DC 20V). Engine ON: 11–14.8V. Engine OFF: 12.0–12.8V
- Check fuse (usually 3–5A)
- Test ground wires, should be near 0Ω
- Confirm polarity before reconnecting
In one fleet install, a tracker kept going offline. Turned out to be a loose ground wire. Tightened it, problem solved in seconds.
Most “faulty” devices? Just bad grounding or wrong polarity.
2. LED Status Indicators

LED lights tell you what’s happening instantly.
- Power light steady - device is on
- GPS blinking - searching for signal
- GPS solid - locked
- Cellular blinking/solid - connecting or connected
No lights at all? Even with power - likely fuse or internal issue.
Quick tip: record a short video of LED behavior. Makes support much faster.
3. Cellular Connection & SIM Setup

If the tracker has power but no data, it’s usually a SIM or network issue.
- Check that the SIM is active and has data
- Remove any PIN lock
- Verify APN settings exactly (no typos)
- Check signal strength (RSSI). Below −100 dBm - unstable
I’ve seen one wrong letter in APN settings stop tracking completely. Fixed it, data came back instantly.
If unsure, test with a direct carrier SIM.
4. GPS Signal & Satellite Diagnostics

Now check if the tracker is getting proper GPS signals.
- Your tracker needs at least 4–6 satellites to show your location properly
- If accuracy is good - location will be very close (a few meters)
- If accuracy is bad - location may jump or be off
- First connection usually takes 30 seconds to 2 minutes
If the signal is weak:
- Move the tracker away from the metal
- Adjust position slightly
- Avoid electrical interference
In one instance, moving the device a few inches dropped lock time from over a minute to under 20 seconds.
5. Logs & Data Review

If live tracking doesn’t explain the problem, the logs will show you exactly what’s happening in the background. Open your tracking platform or app and check the activity logs. You’re looking for simple signals like “No SIM,” repeated restarts, or GPS signal loss. These messages usually point straight to the issue.
If needed, download the logs as a CSV or text file and review the timeline of events. In most cases, you’ll spot where the tracker stopped sending data or started behaving incorrectly.
If you’re working with a fleet tracking system, keeping logs organized for each vehicle saves a lot of time when issues come up again.
Think of logs as a timeline of your tracker’s behavior. Once you read it, the problem becomes much easier to identify.
6. Advanced Testing (If Issue Continues)
If nothing works yet, isolate the problem.
- Swap the SIM into another tracker
- Test device outdoors (open sky)
- Update firmware
I’ve fixed repeated disconnect issues just by updating firmware. Happens more often than you’d think.
7. When to Contact Support or Replace
Only escalate after testing everything above.
Have this ready:
- Device IMEI or serial number
- Firmware version
- LED behavior (photo/video)
- Last working timestamp
- Logs and errors
- Steps already completed
Clear details = faster resolution.
Conclusion: Choose the Right GPS Tracker Installation Method

GPS tracker performance depends on installation quality, power connection, and placement. Each of these determines how accurate and reliable your tracking data will be. Get those right, and even a basic device performs well. Get them wrong, and even expensive systems struggle.
From real installs, the choice is straightforward:
- OBD GPS trackers work best when you want fast setup and flexibility
- Hardwired GPS trackers are ideal for long-term fleet tracking where uptime and control are critical
- Magnetic GPS trackers give you portability for short-term or asset tracking
I’ve seen the same tracker perform perfectly in one vehicle and fail in another, simply because of how it was installed. Small details like ground wires, antenna direction, or mounting location make a bigger difference than most people expect.
If you’ve followed this guide, you already have the advantage. Your installation process is solid. Now it’s about choosing the right tracking solution for your use case.
Why Many Installers Choose SpaceHawk After Setup
After working with different GPS tracking devices, three things always come up: cost, reliability, and ease of use.
- No recurring fees: One-time cost keeps fleet expenses predictable over time
- Proven field performance: Magnetic units maintained sub-3 meter accuracy during testing, while hardwired setups delivered stable tracking across full fleet deployments
- Installer-ready resources: Wiring diagrams, LED reference guides, and quick setup sheets simplify both installation and troubleshooting
- Support when you need it: Access to installer networks and activation guidance helps avoid setup delays
About the Author
Frequently Asked Questions
Where is the best place to put a magnetic GPS tracker on a car?
Is installing a GPS tracker legal?
Can I hardwire a GPS tracker without cutting factory wires?
How long does a GPS tracker battery last?
Does a GPS tracker affect airbags or vehicle electronics?
- Choosing a selection results in a full page refresh.
- Opens in a new window.
 Buy on Amazon